The magic of ftp with user isolation is that every users has his own directory and this user cannot see or browse other users’ directories. In linux, it is similar to “chroot” option after the user has logged in. This feature came from since IIS 7.5 (server2008R2).
In this tutorial, we are going to create FTP with user isolation in Graphical Mode. If you are looking for automatic setup, then I wrote a powershell script for this work here.
1) Install necessary windows server features.
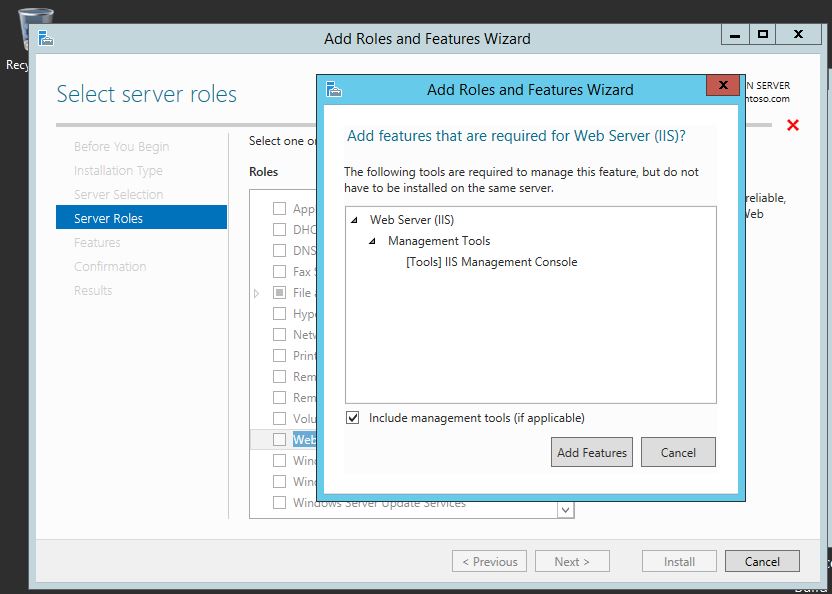
Go to Server Manager >> Add roles and features. Click Next until you find the Select Server Roles.
On the server role page, select Web Server IIS and IIS Management console. See Fig-1.
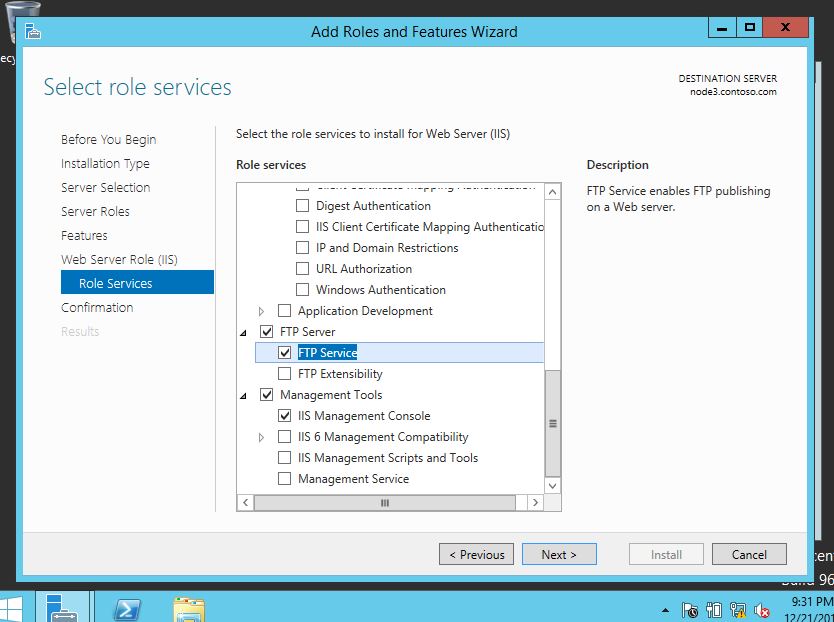
On the Roles services page, select FTP service & IIS Management console. See Fig-2.
Click Next, Next & finishe the installation.
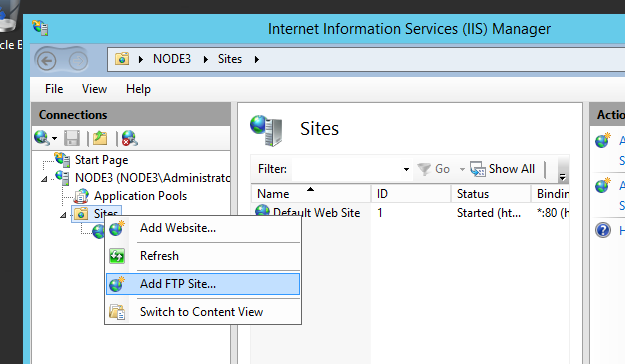
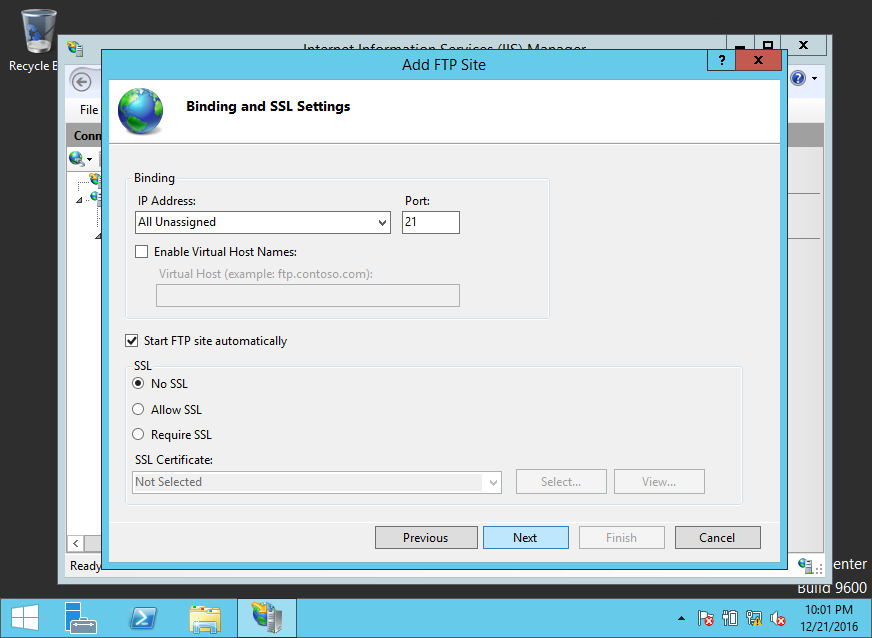
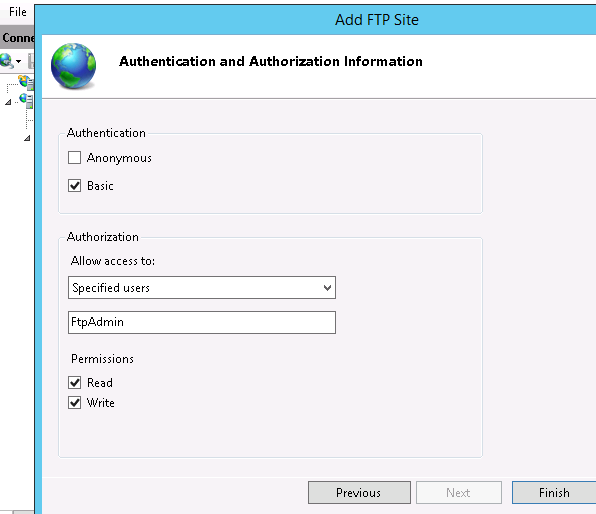
Right-click the site icon & choose “Add FTP Site”. See Fig-3.
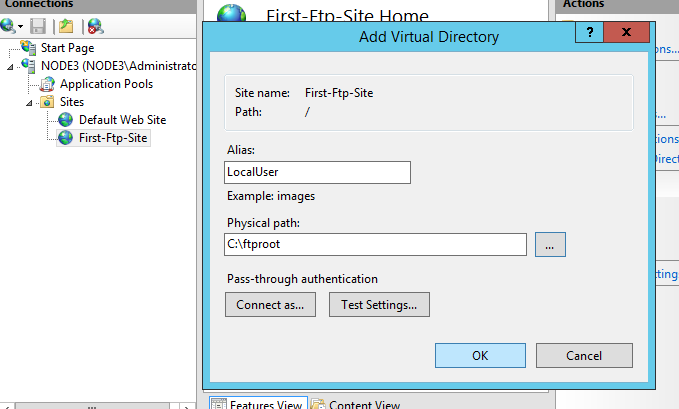
3) Add Root Virtual Directory
You need to add new virtual directory under your ftp site. The name must be ‘LocalUser’, otherwise it doesn’t work for user isolation. Right-click First-Ftp-Site and select ‘Add Virtual Directory…’. Fill out the Alias and physical path. See, Fig-6.
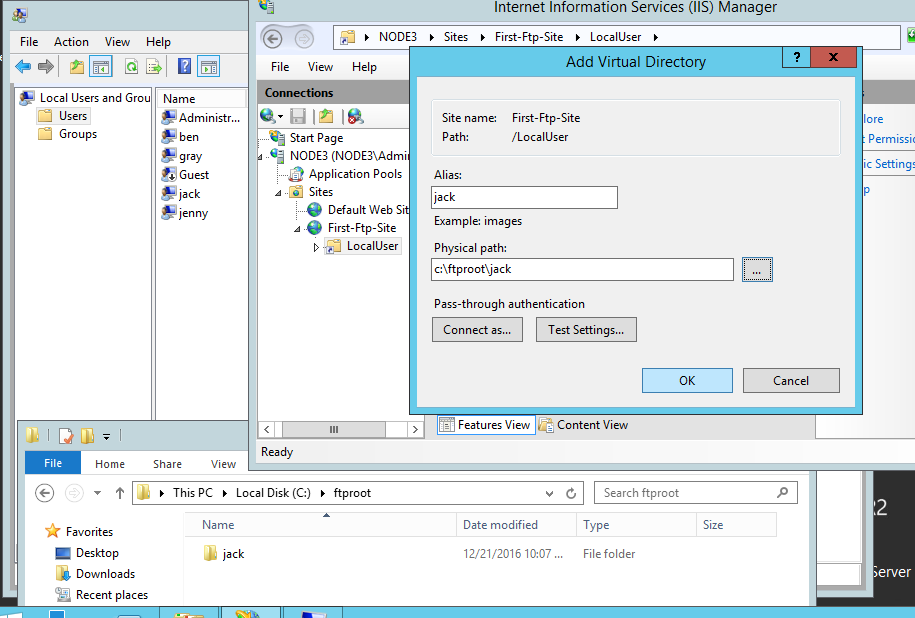
4) Add Virtual Directories for ALL FTP users
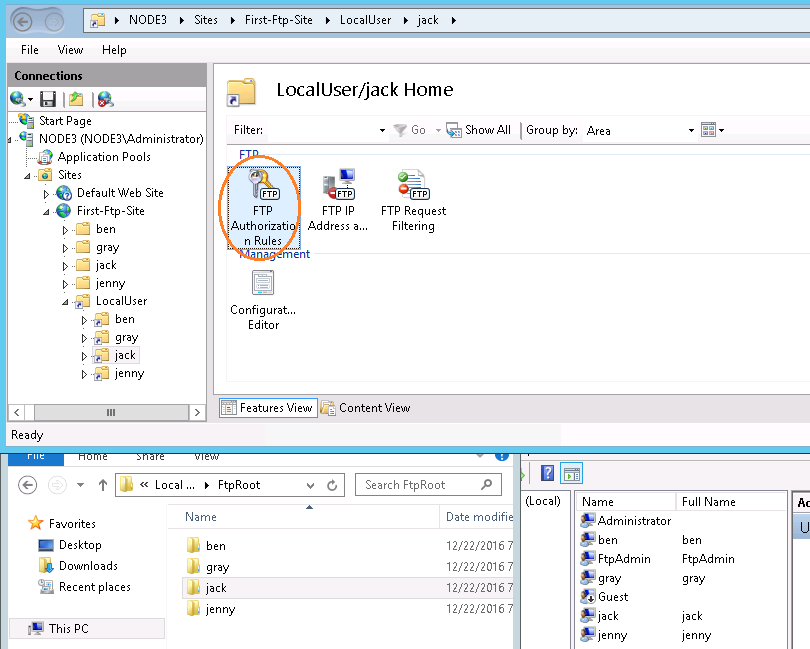
As we do in step-3, we have to add each & every virtual directory for every ftp users. Before this, you need to create every users in ‘Local Users and Groups’ Console. Also, every user’s directory must be created under ftp root folder. See Fig-7. Right-click and ‘Add Virtual Directory’ under ‘First-Ftp-Site’ (I show ‘jack’ for example). Location is C:\ftprootjack. Figure-7 shows up all consoles you need to create with.
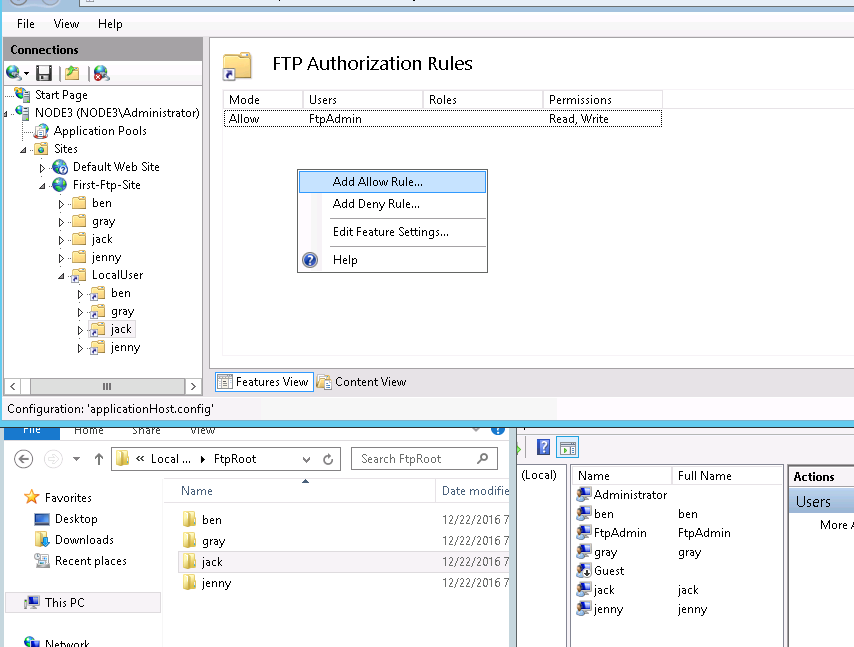
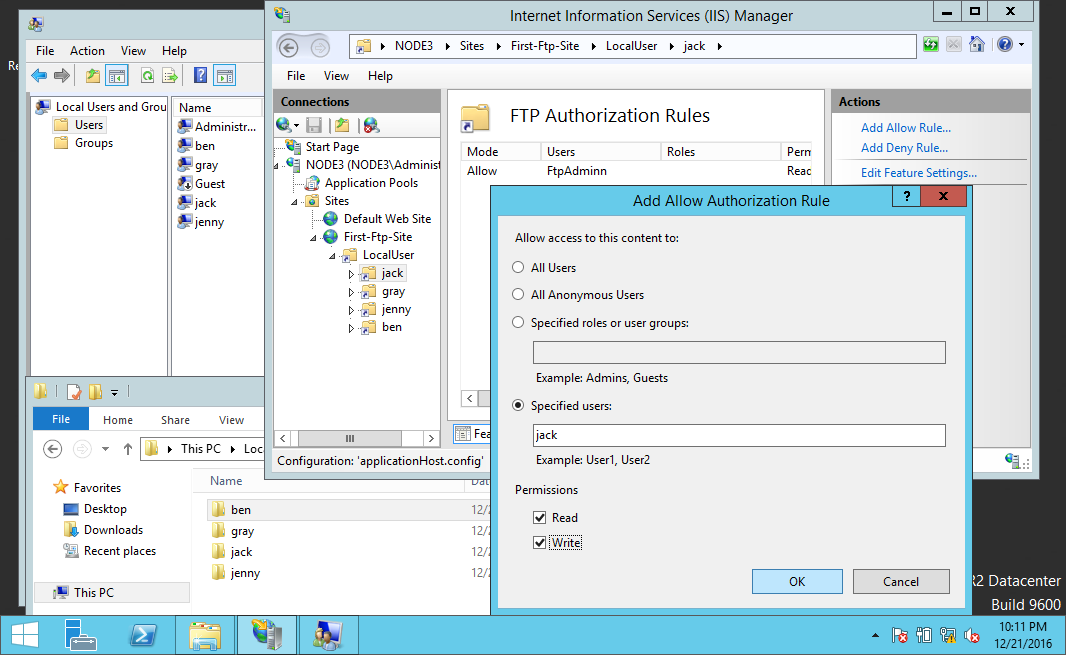
After, you created ‘jack’ virtual directory, we see that ‘FtpAdmin’ inherits the read/write permission from it’s parent FTP site as shown in figure. So, you will need to explicitly add another read/write permission for ‘jack’ to his directory. Select the ‘jack’ virtual directory, double-click the ‘FTP Authorization Rules’. See Fig-8. In the “FTP Authorization Rules” (middle pane), right-click and select ‘Add Allow Rule’. See Fig-9. You will need to give ‘jack’ the read/write permission and click OK. See Fig-10.
You need to do the same steps for all the FTP users.
5) Set FTP User Isolation type and restart the FTP service
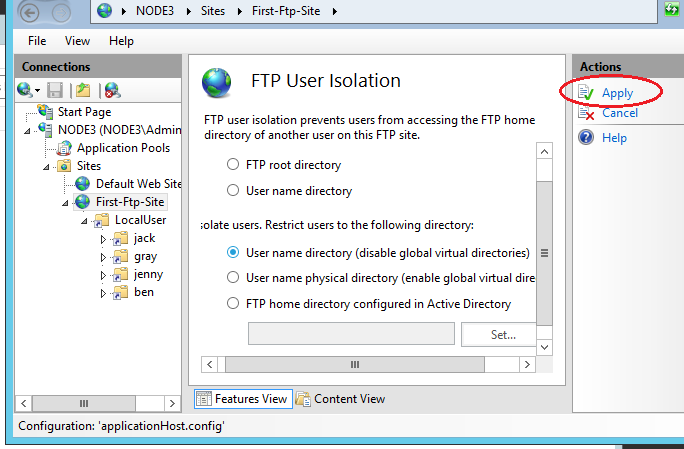
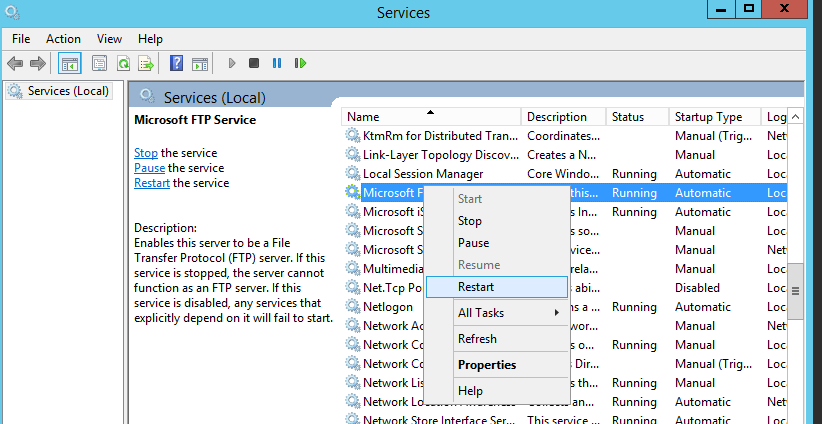
So far, you’ve done with users, physical, virtual directories. You have to turn on FTP user isolation features. To do this, select the ‘First-Ftp-Site’, double-click the “FTP User Isolation”. Select the radio button to “User name directory(Disable global virtual directories)”. On the right pane, click Apply. See Fig-11. Then, restart the FTP service. See Fig-12.
6) Testing with the user ‘jack’
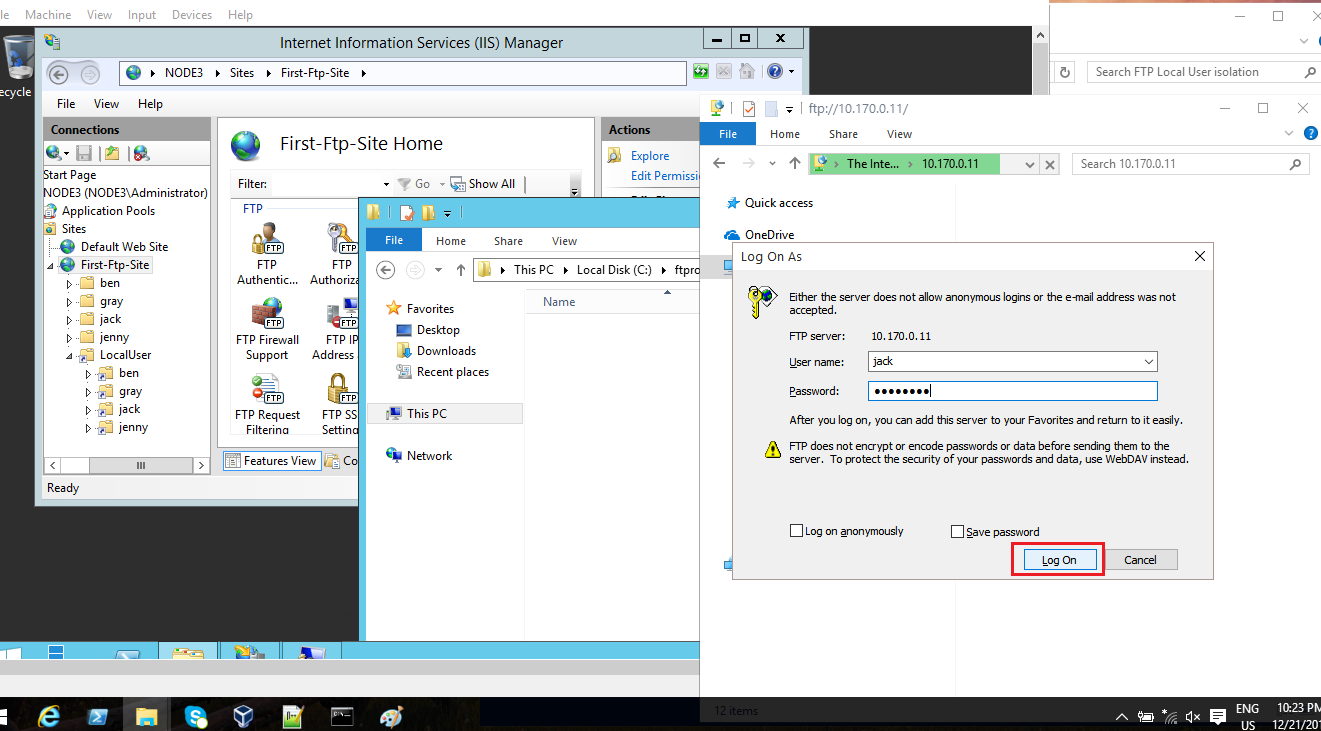
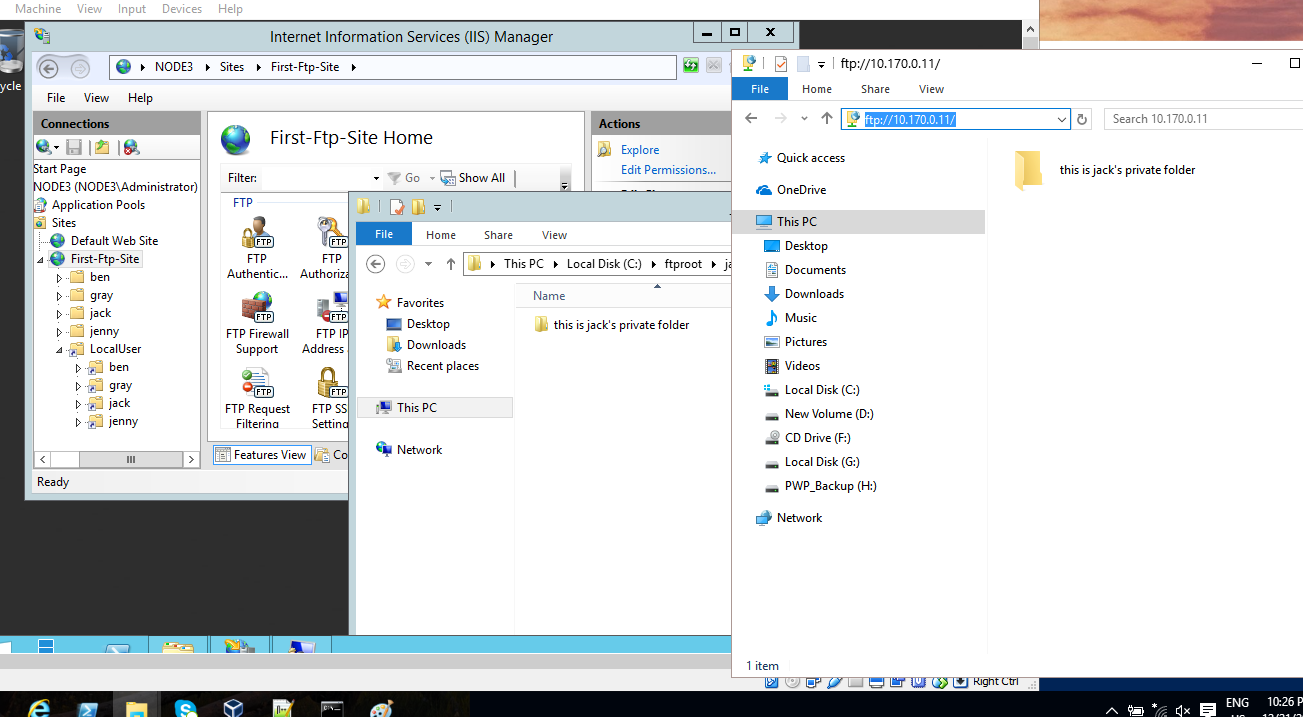
Now, it’s time to test our ftp with our created users. Let’s start with ‘jack’. From another machine, type ftp://yourserverIP/. In my case, it’s ftp://10.170.0.11/. It will prompt you for user name and password. Enter jack’s credentials. See Fig-13.
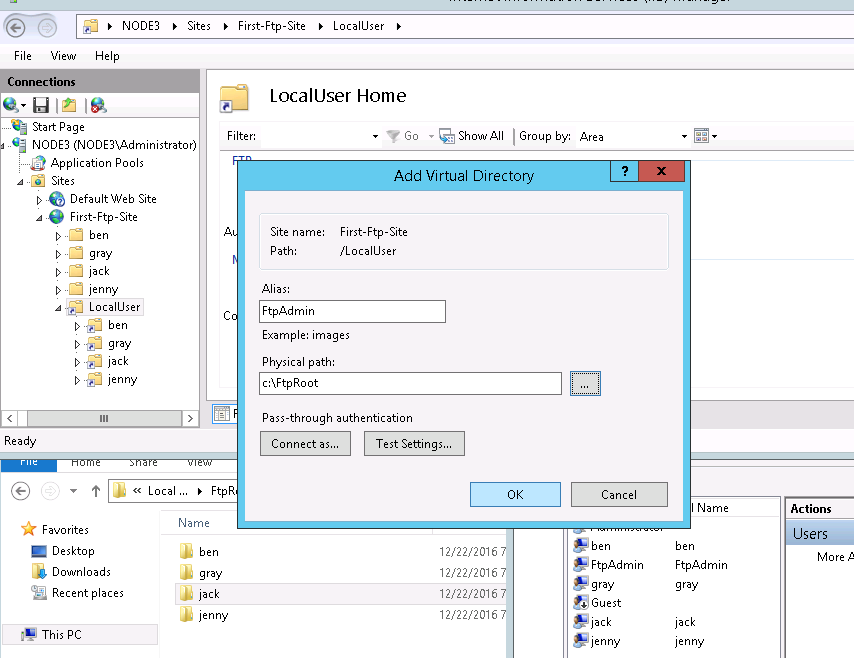
7) (Optional) Adding FTP Administrator
You can add ftp administrator who can browse users’ uploaded files. For this, simply add a virtual directory for FtpAdmin (the user we created earlier) under ‘LocalUser’ directory. The
physical path should be ftp root directory (in our case c:\ftproot). When you connect with ftp admin’s username & password. It will be redirected to ftp root directory. See Fig-15.